Webhooks
Webhooks provide real-time notifications to approved Etsy applications when defined events occur. Rather than polling the API for changes, your app can subscribe to webhook events and receive updates as soon as they happen.
You can see our available events here. Watch our GitHub Announcements for updates: https://github.com/etsy/open-api/discussions/categories/announcements
Webhook functionality is available for both commercial and personal applications!
Webhook Concepts#
- Endpoints – A destination URL where Etsy delivers webhook messages for the events you subscribe to.
- Events – Specific actions or changes that trigger a webhook.
- Messages/Deliveries – Each time an event occurs, Etsy sends a message (payload) to the configured endpoint.
- Signing Secrets – Used to validate the authenticity of incoming webhook requests.
- Retries – Etsy automatically retries delivery when your endpoint fails to acknowledge receipt.
Managing Webhooks#
Prerequisites#
- You must have a valid OAuth 2.0 access token with the appropriate scopes (depending
on your app’s function).
- For webhook delivery, provide a publicly accessible callback URL configured to receive POST requests from Etsy.
Available Events#
We currently support the following events:
order.paid– delivered immediately when an order receives payment.order.canceled- delivered immediately when a seller inititaites a cancelation.order.shipped- delivered immediately when shipping information is created for a product of a shop's receipt.order.delivered- delivered immediately when an order is marked as delivered.
Stay tuned to our announcements for more events coming soon!
Payload Structure#
Each webhook event is delivered as a JSON payload. Although payloads differ by event type, all webhook deliveries share the following common fields:
Payload Structure#
Each webhook event is delivered as a JSON payload. Although payloads differ by event type, all webhook deliveries share the following common fields:
event_type– The name of the event that triggered the webhook (e.g.,order.paid).resource_url- A prepared URL to call back and get the updated data related to the event that was triggered.shop_id- The id of the shop related to the event that was triggered.
Here’s an example of how an order.paid payload would look like:
Verifying Webhook Signatures#
Why signature verification matters#
Without verifying signatures, malicious actors could send forged webhook requests to your endpoint and trigger unintended behaviour. Proper verification ensures that:
- The request originated from Etsy
- The payload has not been tampered with
- You avoid processing duplicate or replayed messages
What do you need#
- A signing secret, which you can retrieve from your Webhook Portal

- You can find this in the details of your webhook event.
- Three special headers + raw body from each request, to be used to validate the payload
What you will see on incoming requests#
Each webhook request will be an HTTP POST to your endpoint that includes:
- Raw request body (JSON)
- Headers:
webhook-id– unique ID of the webhook call (even on retries)webhook-timestamp– unix timestamp (seconds) when the event was emittedwebhook-signature– this is what will be used to compare with your signing secret
How to compute and verify the signature#
- Build the "signed content” string such as:
In this example, raw_body is the exact bytes/string of the HTTP body before any JSON
parsing.
- Derive the secret key.
- Take your secret from the dashboard
- Remove the
whsec_prefix. - Base64-decode the remaining part of the bytes.
- Compute the expected signature:
- HMAC-SHA256 over
signed_content(step 1) using the decoded secret key (step 2). - Base64-encode the result
Here’s a pseudo code example of what this would look like:
- Compare against the
webhook-signatureheader.
- Check if any of the entries (if more than one) equals your
expected_sig(step 3). - If there’s no match, reject the webhook.
- If it’s a match, you may proceed with JSON parsing of the raw body or what your integration requires to interpret this data.
Preventing Replay Attacks#
Even if the signature matches, an attacker could replay an old, captured request. To mitigate that:
- Read webhook-timestamp
- Compare it to your current server time
- Reject if it’s older/newer than your allowed margin.
In your code, it should roughly look like this:
Managing Webhook Events#
From the Webhooks section of your application dashboard, you can:
- View a list of your active webhook subscriptions.
- Inspect details of each subscription, including event type, callback URL, secret (masked), creation date, and delivery history.
- Delete or disable subscriptions you no longer need, which will immediately stop event deliveries.
When you subscribe to an event, Etsy will send a POST request to your callback URL when the event is triggered.
Access the Webhooks Portal#
- Navigate to Manage your apps in the Developer Portal.
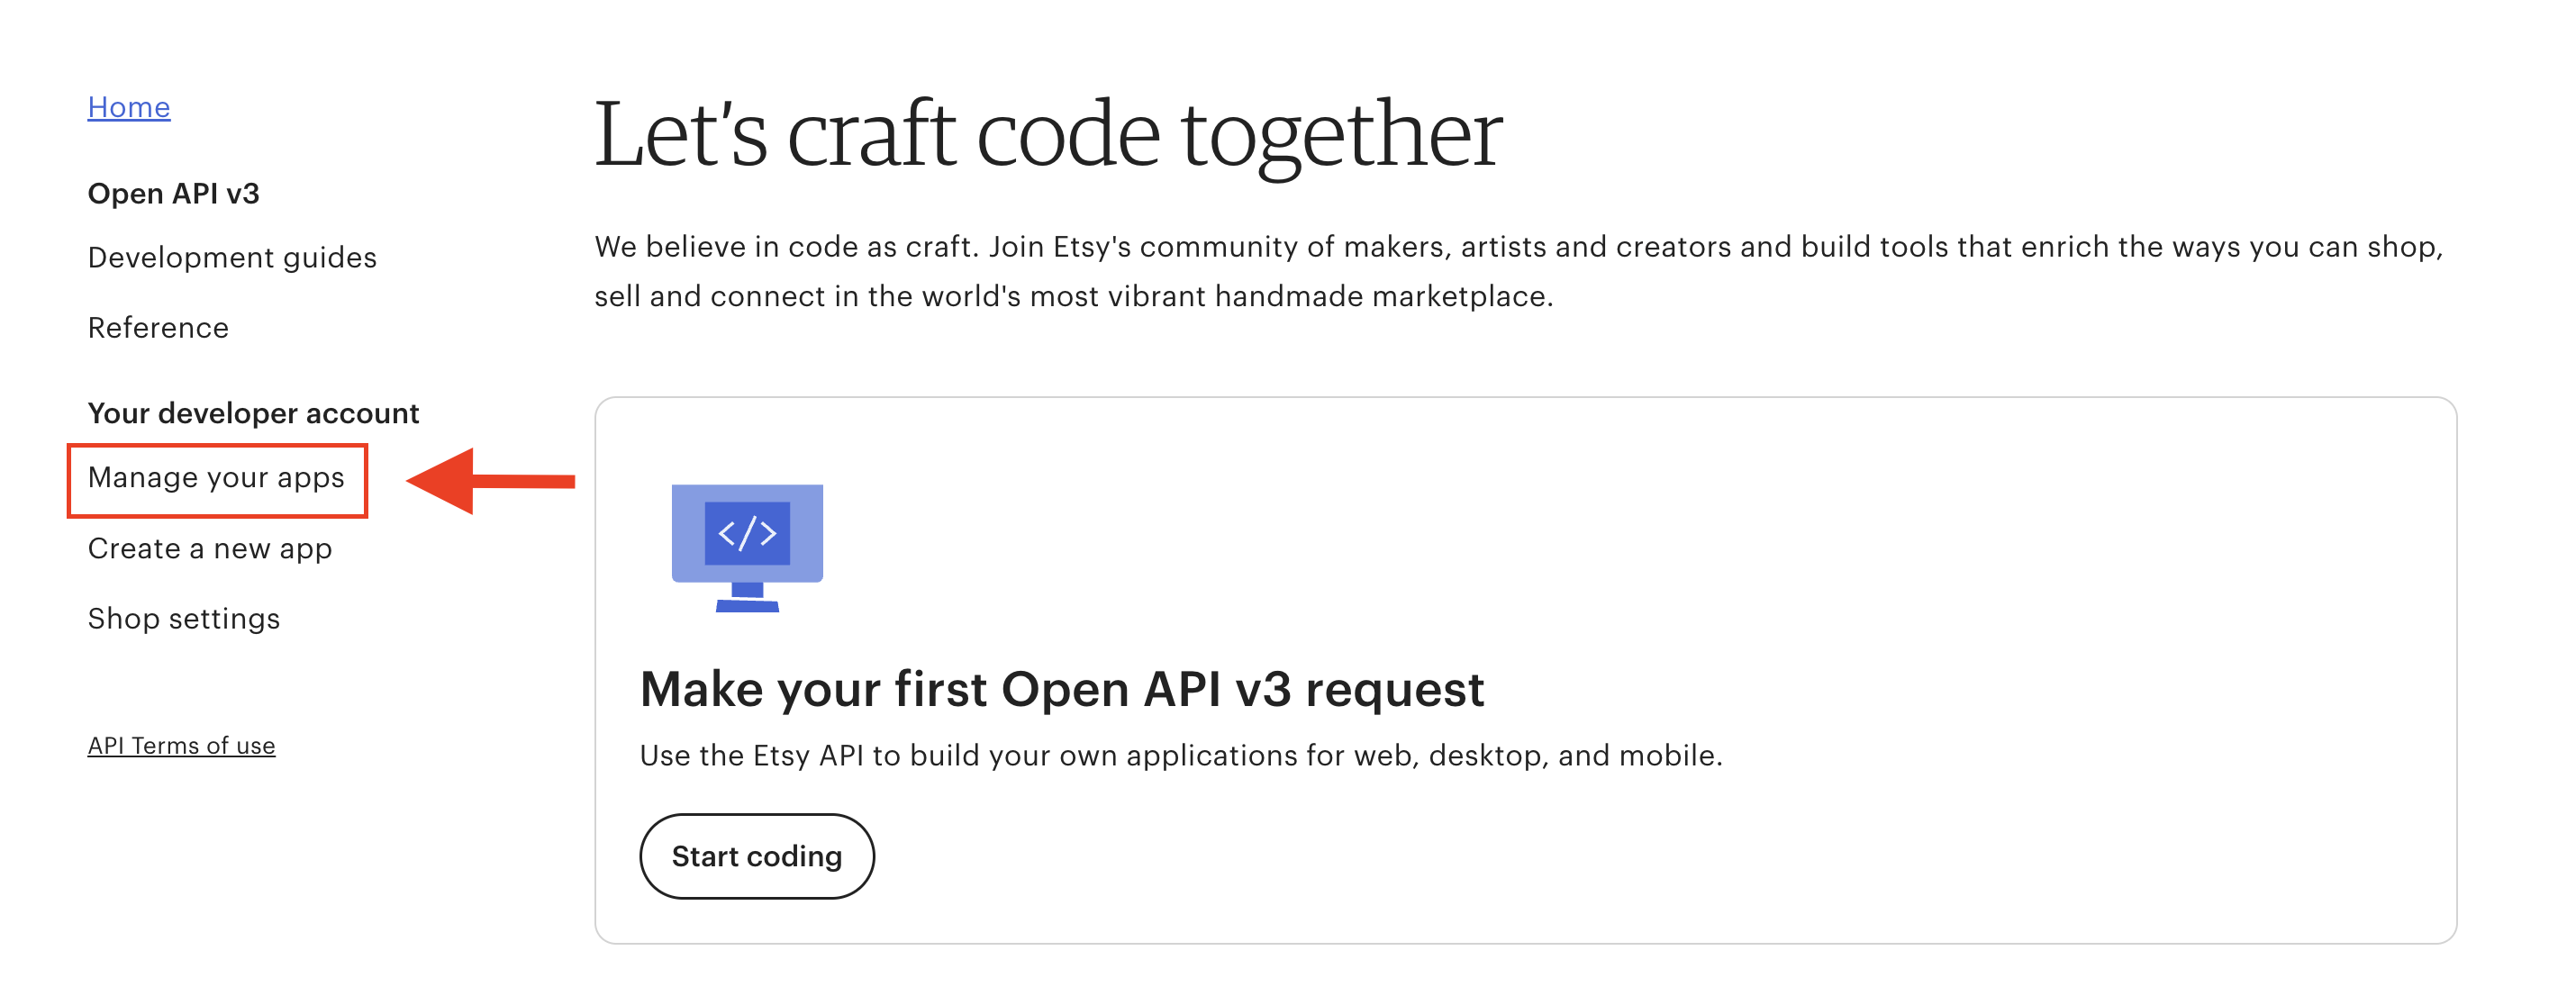
- Click the dropdown menu for your commercial app and select Go to Webhook portal.


You will see your portal.

Configure a Subscription#
Assuming you followed the steps from Access the Webhooks Portal, to configure a subscription:
- Choose +Add Endpoint.

- Enter your callback URL and the event you wish to subscribe to.

- Click Create.
Once saved, your callback URL will receive webhook payloads when the event occurs.
Important
Because webhooks deliver asynchronous notifications, ensure your server can handle incoming POST requests and validate signatures.
How to Unsubscribe (Delete or Disable a Webhook)#
warning
Disabled endpoints remain visible in your dashboard and can be re-enabled at any time. Deleted endpoints cannot be recovered.
Delete a Webhook#
Assuming you followed the steps from Access the Webhooks Portal,to fully delete a webhook subscription:
Select the subscription you wish to remove.
Click the 3 dots on the upper right corner and select Delete.

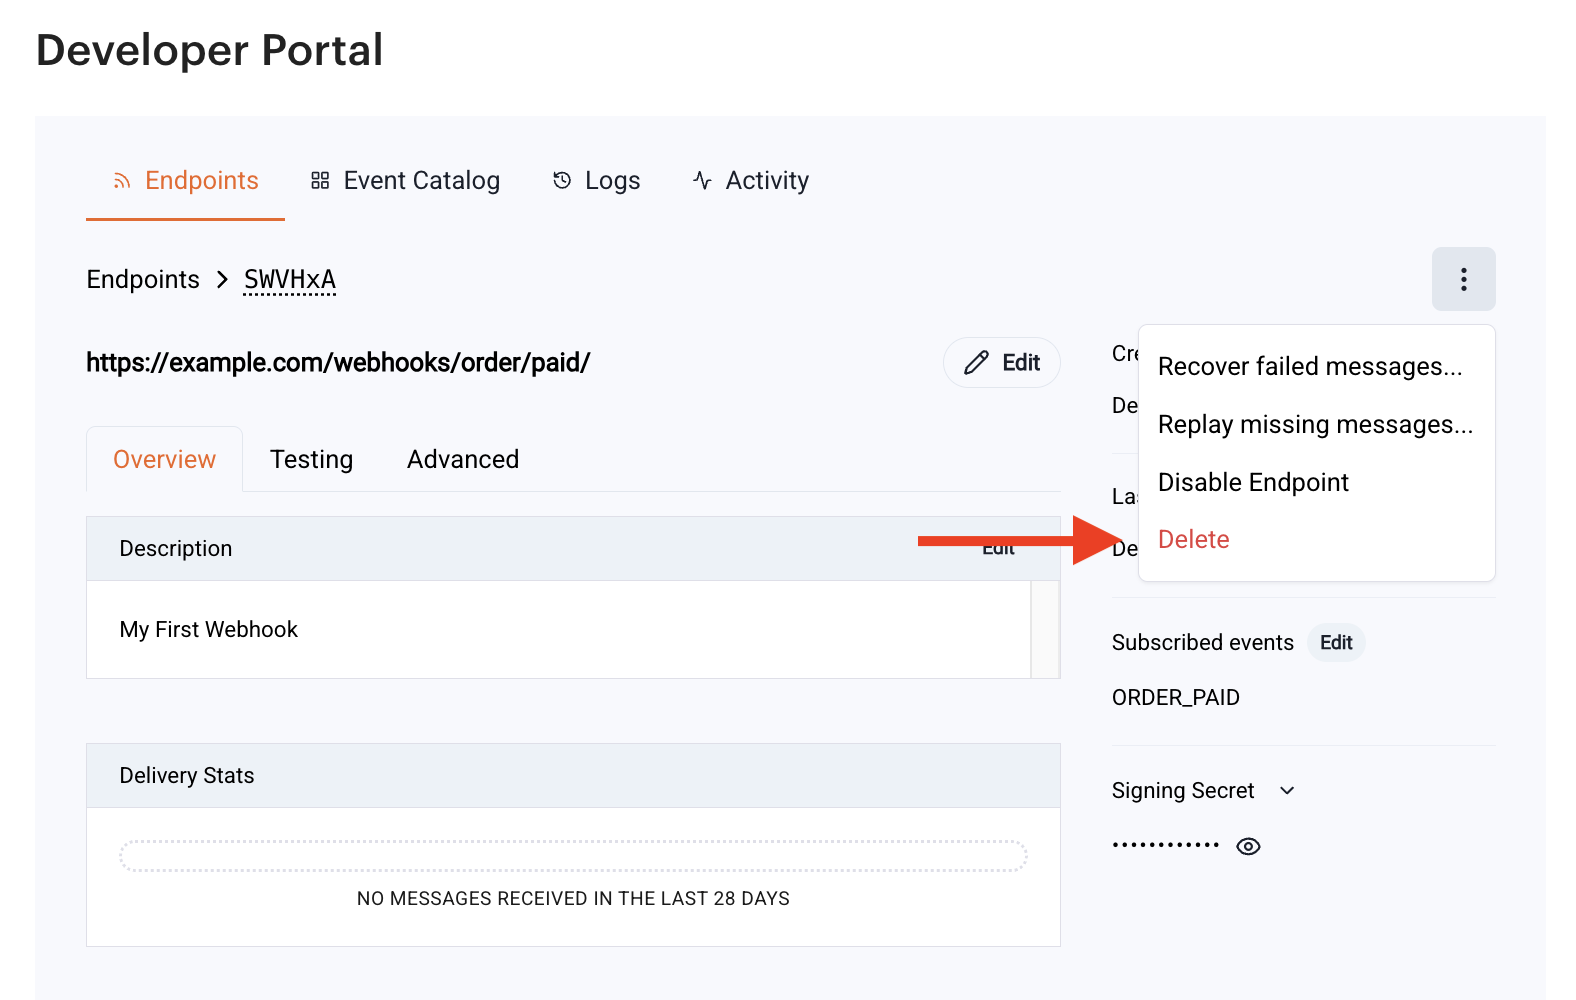
Confirm deletion.

After deletion, no further events will be delivered for that subscription.
caution
Deleting an endpoint will permanently delete all of its data.
Disable a Webhook#
Assuming you followed the steps from Access the Webhooks Portal, to disable a webhook subscription:
Select the subscription you wish to disable.
Click the 3 dots on the upper right corner and select Disable Endpoint.

To enable the event again, do the same process but click Enable Endpoint.

Monitoring Webhook Activity#
Each subscription includes tools and data to help monitor webhook performance and flow. These insights allow developers to troubleshoot issues and understand how the webhook behaves over time.
General Information#
The detail view displays metadata about the subscription, including the date and time it was created. This helps track when the webhook was first configured.

Delivery Stats#
The monitoring section provides an overview of delivery performance. This may include the number of events delivered, recent activity, and overall delivery patterns.

Message Attempts#
For each attempted delivery, you can view whether a message was successfully delivered or if retries occurred. This supports debugging of callback endpoints and helps identify transient or persistent delivery issues.
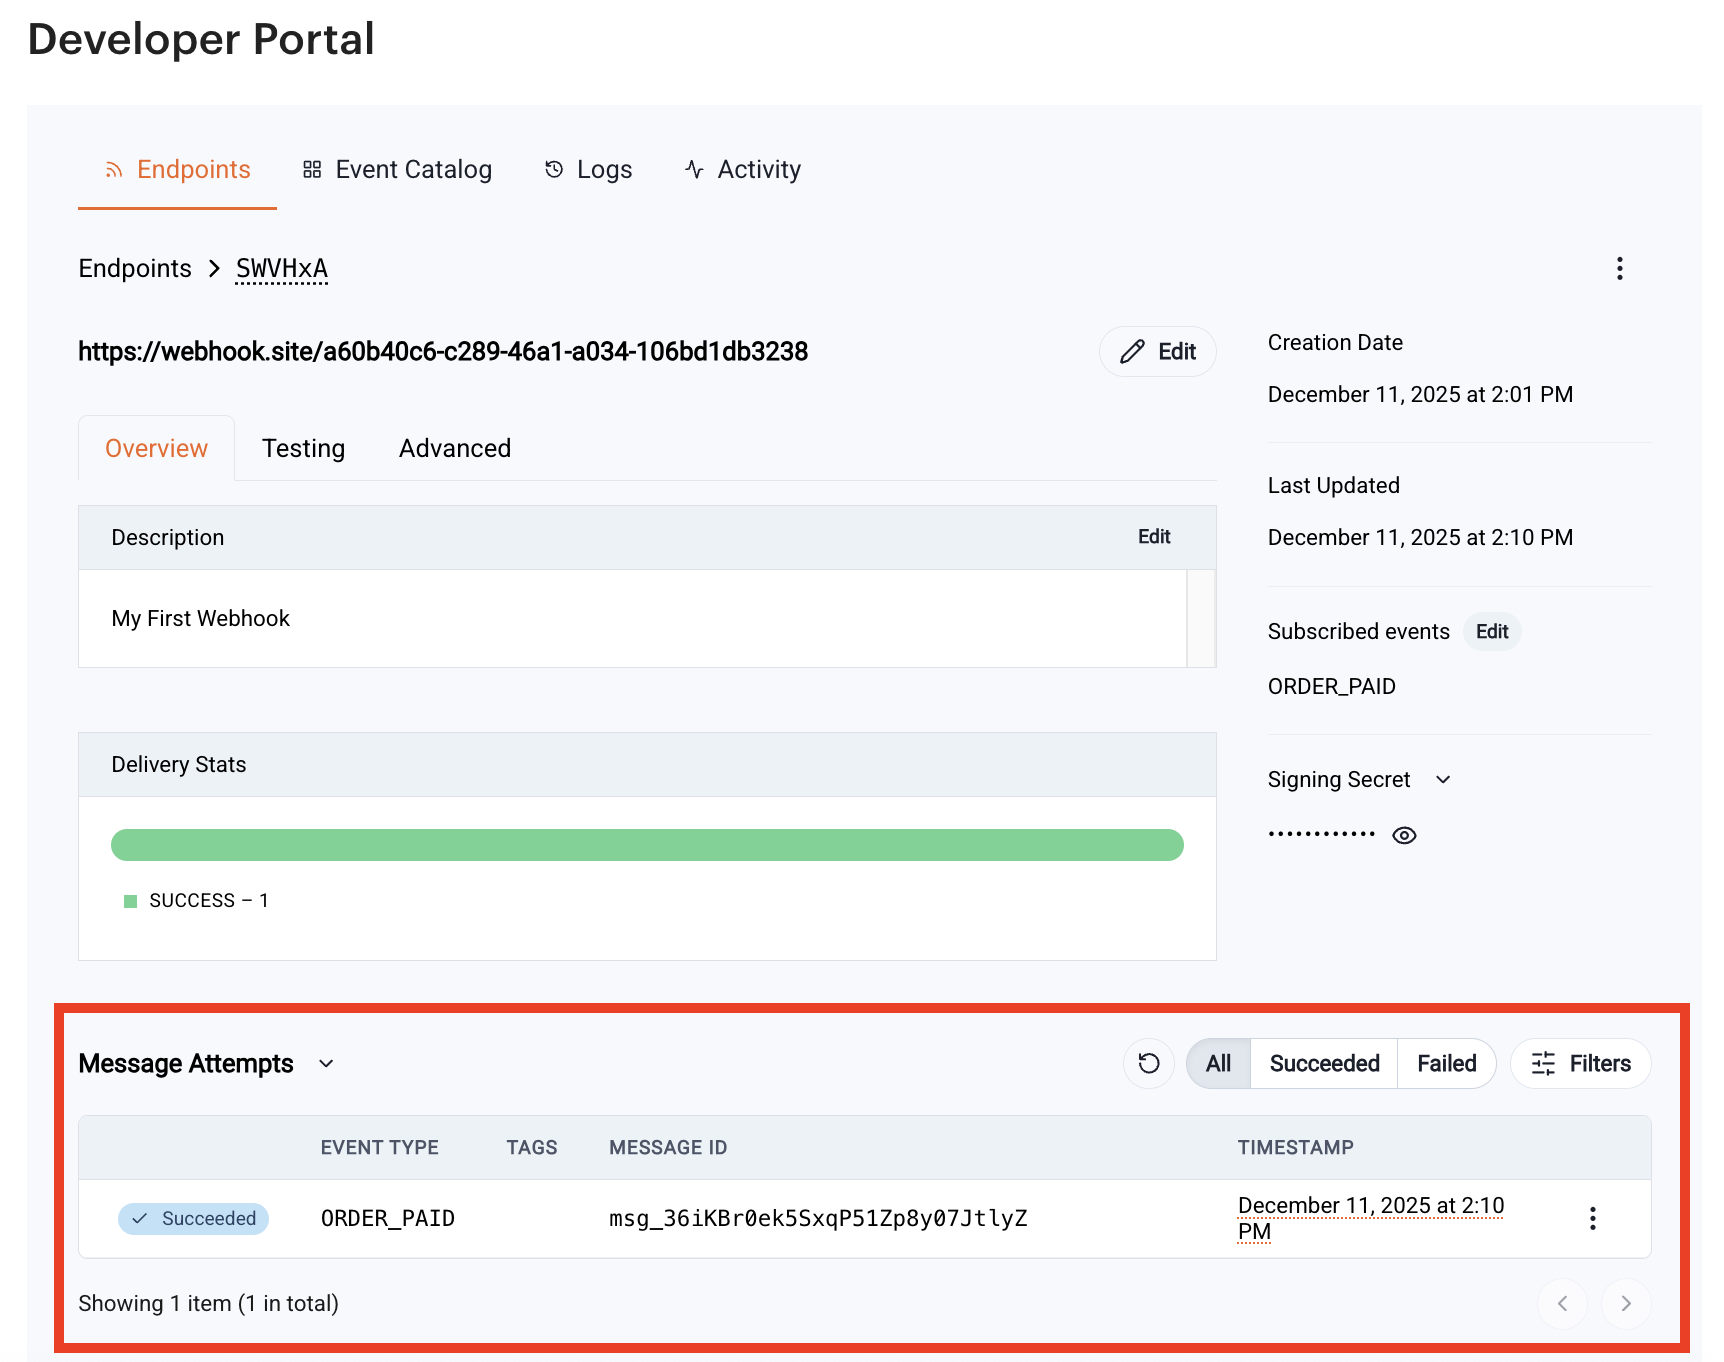
Payload Details#
Recent event payloads appear in the activity log. Developers can inspect these payloads to validate data fields, ensure that their system is parsing them correctly, or verify that events are arriving in the expected format.
By clicking one of the message attempts, you can see the message’s details.

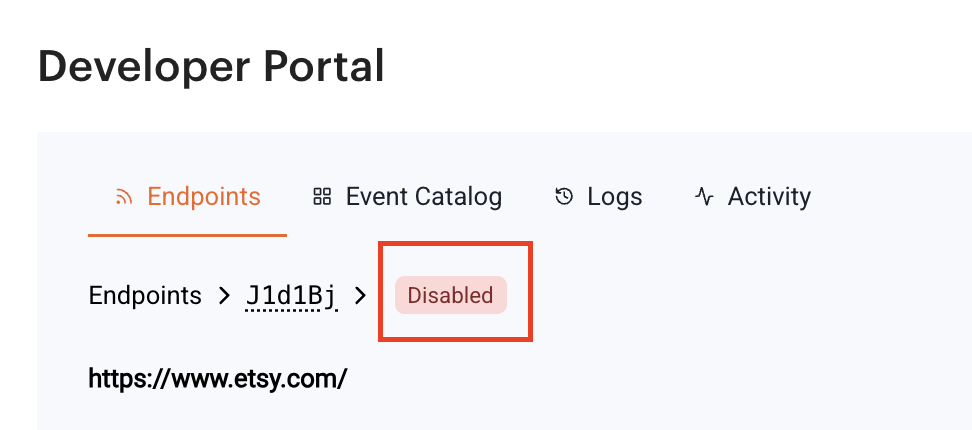
Endpoint Status#
The detail view displays whether the endpoint is active or disabled. Disabled endpoints do not receive events until re-enabled.
Delivery Retries#
We attempt to deliver each webhook message based on a retry schedule with exponential backoff.
The Schedule#
Each message is attempted based on the following schedule, where each period is started following the failure of the preceding attempt:
- Immediately
- 5 seconds
- 5 minutes
- 30 minutes
- 2 hours
- 5 hours
- 10 hours
- 10 hours (in addition to the previous)
If an endpoint is removed or disabled delivery attempts to the endpoint will be disabled as well.
For example, an attempt that fails three times before eventually succeeding will be delivered roughly 35 minutes and 5 seconds following the first attempt.
Manual retries#
You can also use the application portal to manually retry each message at any time, or automatically retry ("Recover") all failed messages starting from a given date.

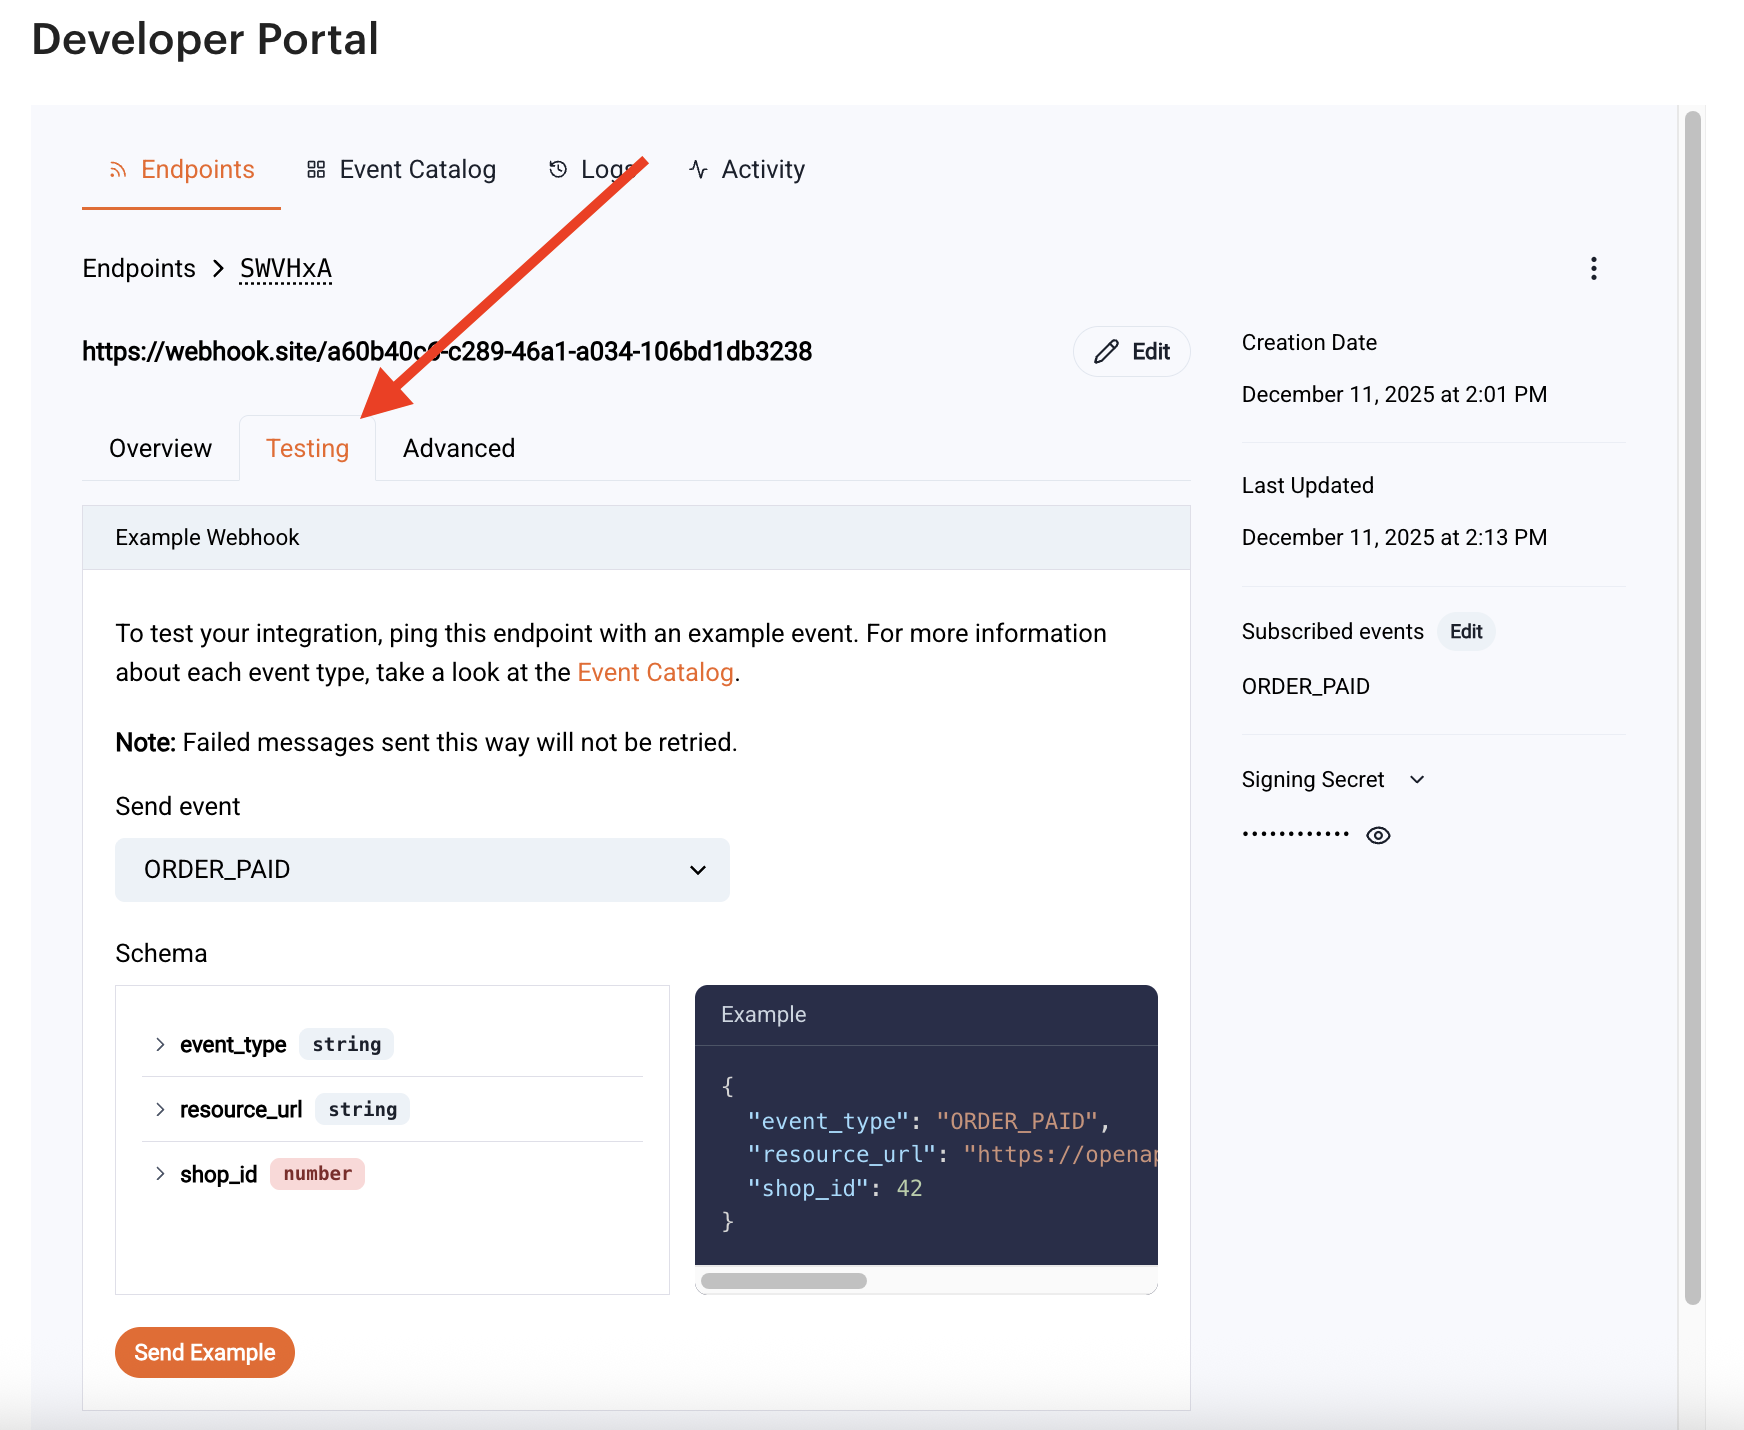
Testing Webhooks#
The Webhook Portal includes tools for sending test events to your endpoint. Use this to validate:
- Endpoint availability
- Signature verification
- Event-processing logic
- Error-handling behavior
You can access the testing tab of your webhook event by clicking the event to access its details.

And then selecting the Testing tab.